Check how you can build your own VFX pipeline, with cheap Kitsu server – for project and task management in VFX or animation – using Raspberry Pi micro computer.
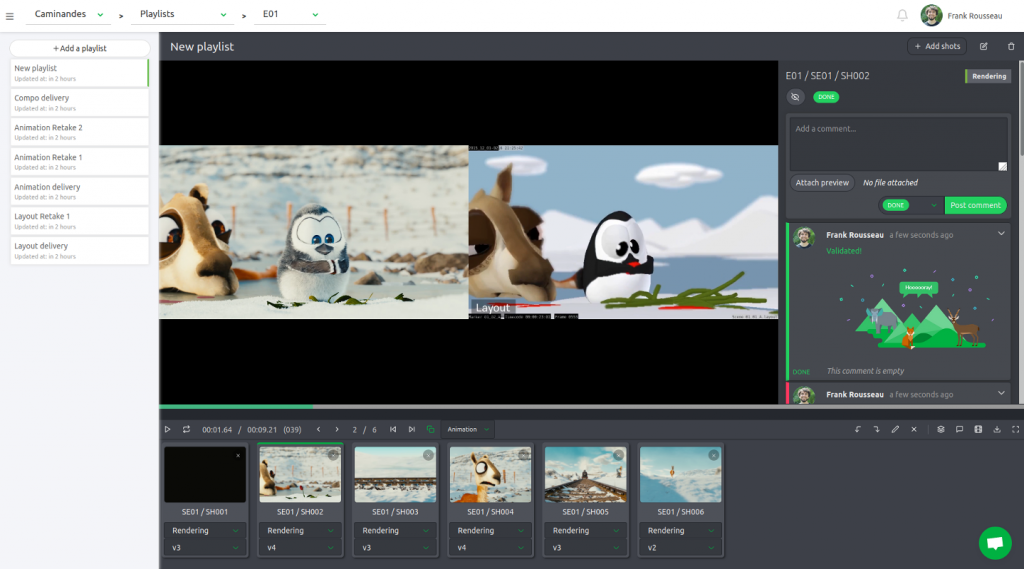
The task management system is Kitsu: https://www.cg-wire.com/en/kitsu.html
Below you will find all the commands and code used to set up a Raspberry Pi server to host Kitsu.
Network configuration:
List network devices
$ ls /sys/class/net
Edit network configuration file:
$ sudoedit /etc/netplan/50-cloud-init.yamlInsert one of the below configuration.
For ethernet configuration:
network:
    ethernets:
        eth0:
            dhcp4: false
            addresses: [192.168.1.130/24]
            gateway4: 192.168.1.1
            nameservers:
              addresses: [192.168.1.1]
    version: 2
For WiFi configuration:
network:
   wifis:
        wlan0:
            optional: true
            access-points:
                "SSID-NAME-HERE":
                    password: "PASSWORD-HERE"
            dhcp4: false
            addresses: [192.168.1.130/24]
            gateway4: 192.168.1.1
            nameservers:
              addresses: [192.168.1.1]
    version: 2
Once ready, apply the changes and connect to your router by executing:
$ sudo netplan applyReboot:
sudo rebootLet’s install any software updates or system upgrades, by typing:
$ sudo apt-get update$ sudo apt-get upgradeIf you wish, you may install a graphical environment for Ubuntu. I would recommend Xfce, which can be found in Xubuntu. You can install it by typing:
$ sudo apt-get install xubuntu-desktopDuring the installation, when asked to choose a Display Manager – select lightdm.
Installing Zou:
Zou is an API that allows to store and manage the data of your CG production. Through it you can link all the tools of your pipeline and make sure they are all synchronized. Let’s start by installing dependencies.
Postgres – for database management:
$ sudo apt-get install postgresql postgresql-client postgresql-server-dev-allRedis server:
$ sudo apt-get install redis-serverPython:
$ sudo apt-get install python3 python3-pipGit:
$ sudo apt-get install gitNginx web server:
$ sudo apt-get install nginxffmpeg, for encoding videos:
$ sudo apt-get install ffmpegjpeg libraries:
$ sudo apt-get install libjpeg-devPWGEN, for random passwords generating:
$ sudo apt-get install pwgenWe will now create a zou user and it’s folders, by typing the following commands:
$ sudo useradd --home /opt/zou zou
$ sudo mkdir /opt/zou
$ sudo chown zou: /opt/zou
We’ll create and operate in a virtual environment:
$ sudo pip3 install virtualenv
$ cd /opt/zou
$ sudo virtualenv zouenv
$ . zouenv/bin/activate
With the virtual environment activated, we can install Zou:
$ sudo zouenv/bin/pip3 install zou
$ sudo chown -R zou:www-data .
Next, create a folder to store previews:
$ sudo mkdir /opt/zou/previews
$ sudo chown -R zou:www-data /opt/zou
Now we’ll be creating a database. Let’s open a new terminal window, but keep the previous one for later – as it’s already working in Zou virtual environment.
We will first switch to postgres user:
$ sudo su -l postgresAnd now create the database:
$ psql -c 'create database zoudb;' -U postgresWe will change the postgres user password:
$ psql
\password
You can close this terminal window, and we’ll create database tables, by typing:
$ DB_PASSWORD=yourdbpassword zou init_dbOf course you should replace „yourdbpassword” with the postgres password, which you have set above.
Open a new terminal window. Let’s now remove some warnings in Redis logs, by editing this configuration file:
$ sudo nano /etc/sysctl.confand adding one line at the end of the file:
vm.overcommit_memory = 1Save it and exit the editor. Let’s create configuration file, to run zou as a daemon:
$ sudo mkdir /etc/zou
$ sudo nano /etc/zou/gunicorn.conf
And put the following information in:
accesslog = "/opt/zou/logs/gunicorn_access.log"
errorlog = "/opt/zou/logs/gunicorn_error.log"
workers = 3
worker_class = "gevent"
Let’s create the log folder:
$ sudo mkdir /opt/zou/logs
$ sudo chown zou: /opt/zou/logs
Now we’ll create a new daemon, to be managed by Systemd:
$ sudo nano /etc/systemd/system/zou.serviceAnd put the following information in:
[Unit]
Description=Gunicorn instance to serve the Zou API
After=network.target

[Service]
User=zou
Group=www-data
WorkingDirectory=/opt/zou
# Append DB_USERNAME=username DB_HOST=server when default values aren't used
# ffmpeg must be in PATH
Environment="DB_PASSWORD=yourdbpassword"
Environment="SECRET_KEY=yourrandomsecretkey"
Environment="PATH=/opt/zou/zouenv/bin:/usr/bin"
Environment="PREVIEW_FOLDER=/opt/zou/previews"
Environment="MAIL_SERVER=smtp.gmail.com”
Environment="MAIL_PORT=465”
Environment="MAIL_USERNAME=your_full_address@gmail.com”
Environment="MAIL_PASSWORD=your_email_password”
Environment="MAIL_USE_SSL=True”
ExecStart=/opt/zou/zouenv/bin/gunicorn  -c /etc/zou/gunicorn.conf -b 127.0.0.1:5000 zou.app:app

[Install]
WantedBy=multi-user.target
You will of course want to put in your database password, and a secret key, which you can generate in a new terminal window, by typing:
$ pwgen 16Copy one of the generated passwords and past it in here. You can add your Gmail account configuration, so Kitsu can send notifications or new users invitations by e-mail.
Save it and quit the editor. We’ll now create a gunicorn configuration:
$ sudo nano /etc/zou/gunicorn-events.confAnd add the following information:
accesslog = "/opt/zou/logs/gunicorn_events_access.log"
errorlog = "/opt/zou/logs/gunicorn_events_error.log"
workers = 1
worker_class = "geventwebsocket.gunicorn.workers.GeventWebSocketWorker"
Then we daemonize the gunicorn process via Systemd:
$ sudo nano /etc/systemd/system/zou-events.serviceAnd insert this data:
[Unit]
Description=Gunicorn instance to serve the Zou Events API
After=network.target

[Service]
User=zou
Group=www-data
WorkingDirectory=/opt/zou
# Append DB_USERNAME=username DB_HOST=server when default values aren't used
Environment="PATH=/opt/zou/zouenv/bin"
ExecStart=/opt/zou/zouenv/bin/gunicorn -c /etc/zou/gunicorn-events.conf -b 127.0.0.1:5001 zou.event_stream:app

[Install]
WantedBy=multi-user.target
Finally we’ll configure the Nginx web server:
$ sudo nano /etc/nginx/sites-available/zouAnd put in the following information:
server {
    listen 80;
    server_name server_domain_or_IP;

    location /api {
        proxy_set_header Host $host;
        proxy_set_header X-Real-IP $remote_addr;
        proxy_pass http://localhost:5000/;
        client_max_body_size 500M;
    proxy_connect_timeout 600s;
        proxy_send_timeout 600s;
        proxy_read_timeout 600s;
        send_timeout 600s;
    }

    location /socket.io {
    proxy_http_version 1.1;
        proxy_set_header Host $host;
        proxy_set_header X-Real-IP $remote_addr;
    proxy_set_header Upgrade $http_upgrade;
    proxy_set_header Connection "Upgrade";
        proxy_pass http://localhost:5001;
    }
}
Let’s now remove the default nginx configuration:
$ sudo rm /etc/nginx/sites-enabled/defaultAnd replace it with our own:
$ sudo ln -s /etc/nginx/sites-available/zou /etc/nginx/sites-enabledWe can now start our daemons and restart Nginx:
$ sudo service zou start
$ sudo service zou-events start
$ sudo service nginx restart
Let’s make sure, that Zou will be automatically starting with the system:
$ sudo systemctl enable zou
$ sudo systemctl enable zou-events
Installing Kitsu:
$ cd /opt/
$ sudo git clone -b build https://github.com/cgwire/kitsu
$ cd kitsu
$ sudo git checkout build
$ sudo chown -R zou:www-data /opt/kitsu
We’ll have to adapt the nginx configuration, that we created previously:
$ sudo nano /etc/nginx/sites-available/zouAnd use this data:
server {
    listen 80;
    server_name server_domain_or_IP;

    location /api {
        proxy_set_header Host $host;
        proxy_set_header X-Real-IP $remote_addr;
        proxy_pass http://localhost:5000/;
        client_max_body_size 500M;
    proxy_connect_timeout 600s;
        proxy_send_timeout 600s;
        proxy_read_timeout 600s;
        send_timeout 600s;
    }

    location /socket.io {
    proxy_http_version 1.1;
        proxy_set_header Host $host;
        proxy_set_header X-Real-IP $remote_addr;
    proxy_set_header Upgrade $http_upgrade;
    proxy_set_header Connection "Upgrade";
        proxy_pass http://localhost:5001;
    }

    location / {
        autoindex on;
        root  /opt/kitsu/dist;
        try_files $uri $uri/ /index.html;

    }
}
Save, exit and let’s restart Nginx server:
$ sudo service nginx restartTo start using Kitsu we first have to create an admin user. We’ll do that in the other terminal window, in our virtual zou environement, with this command:
$ DB_PASSWORD=yourdbpassword zou create_admin adminemail@yourstudio.comUse your correct database password and your email address. And let’s initialise Kitsu data:
$ DB_PASSWORD=yourdbpassword zou init_dataAt this stage Kitsu should be working. You can check that by opening a web browser and typing localhost or the Raspberry Pi IP address.
You can login as the admin, using the email address that you’ve just saved and a word: default as the password. You should be prompted to change that password.
Copy the system to SSD
We’ll start by downloading and installing piclone – which will copy our SD card to the SSD drive.
$ cd home/ubuntu/Downloads
$ wget https://archive.raspberrypi.org/debian/pool/main/p/piclone/piclone_0.16_arm64.deb
And now install the package.
$ sudo dpkg -i piclone_0.16_arm64.debConnect you SSD drive and let’s start piclone by typing:
$ sudo -E dbus-launch picloneIn the first field choose the SD card, on which we have our Ubuntu installed, and in the second field choose the SSD drive. Check the „New Partition UUIDs” and then click Start. Confirm the operation, and wait until it’s done.
USB boot:
We now have Ubuntu copied to the SSD drive, but it will not boot, as we have to perform Eeprom upgrade. The easiest way, will be doing it on Raspberry Pi OS. So let’s turn off the Raspberry Pi, and take out the SD card. On your computer launch Imager, and this time, choose Raspberry Pi OS, and write it to the SD card. You can overwrite Ubuntu, as we have copied it to the SSD drive.
When ready, turn on Raspberry Pi with the SD card inside. Let’s open a Terminal, and perform:
$ sudo apt update && sudo apt full-upgradeWhen it’s done, reboot the Pi. Again open Terminal, and type
$ sudo nano /etc/default/rpi-eeprom-updateMake sure the status is set to „Stable”, save and exit. Now type the following command to update Eeprom:
$ sudo rpi-eeprom-update -d -f /lib/firmware/raspberrypi/bootloader/stable/pieeprom-2020-06-15.binAnd reboot to apply the changes.
Update the config.txt on the SSD boot partition as follows for the [pi4] section:
[pi4]
max_framebuffers=2
dtoverlay=vc4-fkms-v3d
boot_delay
kernel=vmlinux
initramfs initrd.img followkernel
disable_overscan=1
over_voltage=6
arm_freq=2000
gpu_freq=750
Decompress vmlinuz on the boot partition:
$ cd /media/pi/system-boot
$ zcat vmlinuz > vmlinux
Add a new script to the boot partition called auto_decompress_kernel:
$ sudo nano auto_decompress_kernelwith the following code:
#!/bin/bash -e

#Set Variables
BTPATH=/boot/firmware
CKPATH=$BTPATH/vmlinuz
DKPATH=$BTPATH/vmlinux

#Check if compression needs to be done.
if [ -e $BTPATH/check.md5 ]; then
	if md5sum --status --ignore-missing -c $BTPATH/check.md5; then
	echo -e "\e[32mFiles have not changed, Decompression not needed\e[0m"
	exit 0
	else echo -e "\e[31mHash failed, kernel will be compressed\e[0m"
	fi
fi

#Backup the old decompressed kernel
mv $DKPATH $DKPATH.bak

if [ ! $? == 0 ]; then
	echo -e "\e[31mDECOMPRESSED KERNEL BACKUP FAILED!\e[0m"
	exit 1
else 	echo -e "\e[32mDecompressed kernel backup was successful\e[0m"
fi

#Decompress the new kernel
echo "Decompressing kernel: "$CKPATH".............."

zcat $CKPATH > $DKPATH

if [ ! $? == 0 ]; then
	echo -e "\e[31mKERNEL FAILED TO DECOMPRESS!\e[0m"
	exit 1
else
	echo -e "\e[32mKernel Decompressed Succesfully\e[0m"
fi

#Hash the new kernel for checking
md5sum $CKPATH $DKPATH > $BTPATH/check.md5

if [ ! $? == 0 ]; then
	echo -e "\e[31mMD5 GENERATION FAILED!\e[0m"
	else echo -e "\e[32mMD5 generated Succesfully\e[0m"
fi

#Exit
exit 0
Create a script in the /ect/apt/apt.conf.d/ directory and call it 999_decompress_rpi_kernel:
$ sudo nano /media/pi/writable/etc/apt/apt.conf.d/999_decompress_rpi_kernelThe script should contain the following:
DPkg::Post-Invoke {"/bin/bash /boot/firmware/auto_decompress_kernel"; };Make the script executable:
$ cd /media/pi/writable/etc/apt/apt.conf.d/
$ sudo chmod +x 999_decompress_rpi_kernel
You can now restart your Raspberry Pi without the SD card, and SSD drive connected. Your server your be ready and working, and Kitsu available in your local network.


thanks for the enormous contribution! The only thing that I have not been able to make work are the notifications by gmail
Thank you.
That’s weird with gmail notofications. Double check the configuration data in /etc/systemd/system/zou.service. It was working for me with gmail, but in the end I’ve replaced it with another e-mail account.
I recommend adding two more lines in that config:
Environment=”DOMAIN_NAME=your_global_ip-or_domain:5555″
Environment=”DOMAIN_PROTOCOL=http”
The domain will be used for linking in the notofications emails.
just wanna say thanks, it worked perfectly in second attempt.
first attempt, tried on ubuntu 20. (installed correctly) but kitsu ui didn’t showed up in browser. Discussed issue with devs and they mentioned ubuntu 20 is not supported. Tried on new clean ubuntu 18 and worked. cheers
Interesting, on my side, I had no problems with Ubuntu 20.04. But anyway I’m glad you’ve managed to make it work!
After facing issues with CentOS, I decided to follow the video tutorial exactly as executed, so switched to Ubuntu 20 LTS and after completing the installation I faced the same issue: Kitsu couldn’t connect to the API
So I remembered your comment and retried the whole setup on Ubuntu 18 LTS and it worked. Thank you for sharing your solution. Did the CGwire team give you a list of supported OSes?
Thank you this is a great resource. The documentation from CG Wire was simply lacking a lot of details.
Would it be possible to deploy this on a cloud instance running CentOS or does it specifically require Ubuntu? Would you be interested in doing a video or blog tutorial of installing Kitsu on CentOS?
Thank you! I think the installation process should be similar on other systems. I chose Ubuntu because they have a Raspberry Pi dedicated distro. But if you have a running CentOS, just try to recreate the tutorial’s Kitsu installation steps.
I was following the video tutorial step by step and got stuck at the part where you launch a virtual environment: ‘sudo virtualenv zouenv’.
I got an error saying “unknown operation virtualenv”. I’m sorry but I have a very basic understanding of the linux terminal, which is why I’m struggle sometimes.
It seems the ‘virtualenv’ was not installed. You install it with: sudo pip3 install virtualenv – did that give you any errors ?
It shows me a bunch of messages saying “Requirement already satisfied”. Here’s a screenshot: https://i.gyazo.com/075a6afecd908d8c18f260e26561a30a.png
It must be something related to CentOS then. I’m not a Linux guru unfortunately, so I’m unable to help. Try asking about it at: https://stackoverflow.com/
IMHO,
to check weather virtualenv is installed and useable, just type
which virtualenv >> it should print its path, which means you can use it as a command.
typically to deal with virtualenv, i prefer using virtualenvwrapper (another module to help using / maintaining virtualenv module with ease. its slightly more complicated to setup, once done with bashrc etc, it give you few commands, my fav is workon)
in this link
https://gist.github.com/lalamax3d/41a40dbb032e4098d44231a19d0b94ef
line 31 to line48 >> will give you idea of setting it up.
if you are thinking about setting KITSU on centos with intention of integrating with your website / online server with domain or subdomain etc. my recommendation is still keep it in a separate server and proxy forward domain/subdomain here.
Nice!
Hey do you have any time to do a windows version tutorial?
Great tut
Thanks!
I don’t think this is possible on Windows, also I don’t have any Windows machines.
thnank very much for this ! installed great for me on ubuntu 18. theonly problem is that i cant upload any media to kitsu … i receive an error when posting a comment or a broken image when i upload my avatar png or jpeg ..
Is it possible change the size of the thumbnail?
I did search in the document but no luck.
P/S:
Thank you so much for this article.
I have just fully replace Shotgun with Kitsu in my studio pipeline. It works as expected.
Hi,
I don’t think you can change the thumbnail size. But you can suggest new Kitsu features at: https://cgwire.canny.io/
kitsu doesn’t run runtime updates, where did I install it wrong?
Here is the video on the home page: https://youtu.be/EH3RbmHykrE?t=78
Thanks
I managed to start the service but I still have a few difficulties:
1- mails don’t work (I have tried adding the suggested 2 lines, but didn’t work);
2- pages don’t refresh automatically and I keep having to press F5.
Can anyone help?
Hi,
Are you sure you’ve entered the correct mail server information, for sending emails?
I’m not sure what you mean by automatic page refreshing ?
Lukas